If you've ever moved before, you probably already know this: the kitchen takes three times longer than you expect. You open a cabinet to start packing and suddenly realize you have seventeen mismatched mugs, a cast iron skillet that weighs as much as a small child, a blender you haven't used in two years, and an entire shelf of spice jars with one tablespoon of paprika left in each of them. And that's just one cabinet.
The kitchen is legitimately the most labor-intensive room to pack in most homes. It has more individual items than any other room, a higher concentration of fragile things, and the most variety in terms of size, shape, and material. Done poorly, you end up with broken plates, shattered glasses, and boxes that clank ominously every time they get touched. Done well, everything arrives exactly as it left.
This guide covers how to pack a kitchen for a move properly—dishes, glasses, pots, appliances, pantry, and all the random stuff in between. It also covers what to do when packing it yourself isn't the right call.
Start Early and Start With What You Don't Use
The kitchen should be one of the first rooms you start packing—not one of the last. Most people make the mistake of leaving the kitchen until the final day because they're still using it. That thinking leads to frantic last-minute packing, broken things, and mismatched boxes stuffed with whatever fit.
The smarter approach: identify everything in your kitchen you don't use daily or weekly, and pack those items first. That's probably more than you think. The formal china that comes out twice a year. The baking sheets for holiday cookies. The blender that lives in the back of the cabinet. The platters, the serving bowls, the waffle iron, the fondue set from 2008 that you keep meaning to use. All of that can be packed weeks before move day without affecting your daily life at all.
Packing in stages—clearing out the rarely-used items first, then working toward the everyday stuff as move day approaches—keeps the kitchen functional right up until the end while still making real progress. On the day before or morning of the move, only the essentials are left: everyday dishes, a few pots, the coffeemaker, and whatever's been feeding you through the chaos of the last few weeks.
The Supplies You Actually Need
Before you pack a single item, get your supplies together. Kitchen packing specifically requires more packing material per box than any other room, and running out mid-way through is exactly how you end up improvising with bath towels around your wine glasses and hoping for the best.
For a typical kitchen, you'll want:
- Dish boxes (also called dish packs) — These are double-walled cardboard boxes specifically designed for kitchen items. They're heavier and more rigid than standard moving boxes, which matters a lot when stacking boxes in a truck. A standard kitchen will go through four to eight of these depending on how much you have.
- Packing paper — Also called newsprint or butcher paper. This is the main wrapping material for dishes, glasses, and most kitchen items. You'll go through more of this than you expect—plan on at least two or three full bundles for a well-stocked kitchen.
- Bubble wrap — For truly fragile items: crystal glasses, irreplaceable serving pieces, anything that would be devastating to break. Packing paper is usually sufficient for everyday dishes, but bubble wrap adds a real layer of protection for things that matter.
- Packing tape and a working tape gun — You need to seal boxes firmly, especially heavy dish boxes. Two tape guns is not overkill; one will disappear at some point.
- Permanent markers — Mark every box clearly, on the top and on at least two sides. Mark fragile items on all four sides and on top, not just once.
- Cell dividers — Cardboard cell dividers that fit inside boxes and separate glasses individually. These are the single best thing you can do for your glassware. Many moving supply stores and moving companies carry them, and they dramatically reduce glass-on-glass contact during transport.
- Stretch wrap — Useful for keeping pot lids together, bundling cutting boards, wrapping utensil trays, and securing items that don't pack neatly into boxes.
Don't try to substitute proper packing paper with newspaper. Newspaper ink transfers to dishes—you'll arrive at your new home and spend an afternoon washing off gray newsprint from your plates before you can use them.
How to Pack Dishes Without Breaking Them
Dishes are where most kitchen packing accidents happen, and almost all of them come down to the same few mistakes: not enough cushioning, boxes that are too heavy, or dishes packed flat instead of on their edge.
The Right Way to Pack Plates
Start by creating a cushioned base in the box. Crumple several sheets of packing paper and lay them in the bottom of the dish box—this is your shock absorption layer and it matters. Don't skip it.
Wrap each plate individually. Lay a plate in the center of two or three sheets of packing paper, fold the corners in over the plate, and roll it forward so it's completely enclosed. For extra security, wrap two plates together face-to-face (like a sandwich) with paper between them—this doubles your packing speed without sacrificing protection.
Here's the key thing most people get wrong: pack plates standing on their edge, not flat. A plate laid flat has its full surface area exposed to the weight of whatever is stacked on top of it. A plate standing on its edge distributes force along its strongest axis—the rim. Broken plates during moves are usually flat-packed plates. Plates standing on edge, well-cushioned on all sides, almost never break.
Don't overfill the box. A dish box with plates should weigh no more than 40 to 45 pounds when full—heavier than that and you're creating a box that's hard to carry safely and puts stress on the bottom. When the box is full, fill any remaining gaps with crumpled packing paper so nothing can shift, then tape the top firmly.
Packing Bowls
Bowls pack similarly to plates—wrap each one individually, nest smaller bowls inside larger ones with paper between each, and pack them on their side (think of it as stacking bowls on their rim rather than their base). Bowls are a bit more forgiving than plates since they're curved, but they still need proper cushioning on all sides.
Packing Mugs and Cups
Wrap each mug individually with at least two sheets of packing paper. Give special attention to the handle—it's the most vulnerable part and the most likely to break. When wrapping, start with the handle end, fold paper in, and then roll the mug forward so it's completely enclosed.
Pack mugs upright or on their side, not upside down. Lay a cushioned layer in the bottom of the box, set mugs in a row with paper between each one, then add another layer of crumpled paper before adding a second row on top. Don't stack more than two rows of mugs in a single box.
How to Pack Glasses and Stemware Without Breaking Them
Glasses and stemware are the single most commonly broken kitchen items in a move, and also among the most preventable losses. Cell dividers and proper wrapping technique make a dramatic difference.
Regular Drinking Glasses
If you have cell dividers, use them—one glass per cell, period. If you don't have dividers, wrap each glass individually with at least two or three sheets of packing paper. The technique: stuff a sheet of crumpled paper inside the glass first (this cushions from the inside), then set the glass on a corner of flat packing paper and roll it diagonally, tucking in the ends as you go.
Pack glasses upside down in the box. This is counterintuitive but correct—a glass packed rim-down is much less likely to have its rim chipped than one packed rim-up. Place them in rows with ample padding between each glass and between rows.
Wine Glasses and Stemware
Wine glasses and crystal are the items most likely to cause grief during a move, and they deserve extra care. Wrap each glass individually in two to three sheets of packing paper, with particular attention to the stem—wrap that section separately and reinforce it before wrapping the bowl. For anything crystal or genuinely valuable, add a layer of bubble wrap over the packing paper.
Wine glasses should each have their own cell divider. If you're using dish boxes without dividers for stemware, consider whether professional packing is the right call for these items specifically. The cost of professional packing for a set of quality wine glasses is usually far less than replacing them. Our professional packing services are an option worth asking about when you get your quote—we can pack the fragile items and leave the rest for you to handle yourself.
Pots, Pans, and Baking Sheets
Pots and pans are the easiest kitchen items to pack—they're heavy and largely indestructible—but packing them wrong leads to very heavy boxes and damage to non-stick coatings.
Nest pots inside each other when possible to save space, but place a sheet of packing paper between each pot to protect non-stick and ceramic coatings from scratching. Pack lids separately—either in the same box (standing upright, padded) or wrapped individually and packed with the pot they belong to.
Keep pot boxes heavy but manageable. A box of cast iron cookware can hit 40-50 pounds very fast, and that's about the limit for safe carrying. Better to have two medium-weight boxes than one box that no one can lift without risking a back injury.
Baking sheets, cutting boards, and sheet pans pack well together—wrap in paper, stand them upright on edge in a box (the same principle as plates), and they'll travel fine.
Packing Kitchen Appliances
Small appliances—toasters, blenders, food processors, stand mixers, coffee makers—are relatively forgiving but benefit from some specific prep before they go in boxes.
Use original boxes when you have them. If you kept the original packaging for your KitchenAid or your espresso machine, that packaging was designed specifically for that appliance and provides better protection than anything you'll put together yourself. Worth the closet space to keep them.
When you don't have original boxes: wrap appliances in packing paper, then wrap again in bubble wrap if they have glass components, LCD displays, or anything else breakable. Remove any detachable parts (blender jars, food processor bowls, mixer attachments) and pack them separately—wrapped in paper, nested together, or in a box with good padding. Tape or rubber-band cords to the body of the appliance so they're not flopping around.
Coffee makers and tea kettles: drain them completely before packing. Any residual water will leak into the packing material and potentially into the box itself during transport.
For larger appliances—microwaves, toaster ovens—wrap in moving blankets and pack in their own boxes. Make sure buttons and glass doors are protected; moving blankets alone may not be enough cushioning for a glass microwave door.
The Pantry: The Part Everyone Underestimates
The pantry is what takes most people by surprise when packing a kitchen. It looks manageable. It is not manageable. The average home has far more non-perishable food than they realize until it's all on the counter waiting to be packed.
First, be ruthless about what's worth moving. Open cans, partial bags of flour, a jar of vinegar that's three-quarters empty, the mystery grain you bought for one recipe and never used again—a lot of pantry staples are genuinely not worth the weight and box space to move. Plan meals around using up perishables and semi-perishables in the weeks before the move. Donate non-perishables in good condition to a local food bank before move day.
For what you are taking: pack canned goods and heavy items in small, sturdy boxes. Cans are dense—a 12-can box of beans is heavy enough to hurt. Spice jars, oils, and vinegars need to be packed upright if possible, and it's worth wrapping bottles in plastic wrap or zip-lock bags before packing them, because lids come loose during transit. A broken bottle of olive oil inside a box of your other pantry items is one of those move disasters that haunts you.
Dried goods in bags—rice, lentils, pasta—are best moved in their original sealed packaging if intact, or transferred into zip-lock bags before packing if the bags have already been opened. A bag of rice that opens inside a moving box is a mess that's hard to fully clean up.
A Few More Things Worth Mentioning
Knives
Kitchen knives need to be handled carefully—for both the knives' sake and the sake of whoever is unpacking boxes at the new place. Wrap each knife individually in packing paper, fold the paper over the blade multiple times, and secure it with tape. A knife block can be packed as a unit with the knives inside, wrapped in packing paper and then a moving blanket. Loose knives in a box that aren't clearly labeled are a hazard.
Glassware from Cabinets Up High
The glasses you don't use often—the formal glassware, the holiday stuff up on the highest shelves—pack these first. They usually need the most wrapping and they're the items you're least likely to need access to during the packing process.
Label Boxes for Destination, Not Just Contents
Every kitchen box should say "KITCHEN" large and clear on multiple sides, so your movers know exactly where it goes without asking. Add contents on the top of the box as well—"Kitchen – wine glasses, plates" tells you at a glance which box to prioritize unpacking first when you need dishes that first night. Fragile boxes should say FRAGILE on all four sides and on top.
The "First Night" Box
Pull out a small box or bag of kitchen essentials that you'll need on arrival night: a couple of plates, forks and spoons, a glass or two, dish soap, a sponge, paper towels, the coffeemaker, and coffee. Keep this box with you in the car—not in the moving truck—and unpack it the moment you arrive. It makes the first night at the new place dramatically less stressful.
When to Hire Professional Packers Instead
Packing a kitchen yourself saves money if you have the time and the patience to do it right. But it's a genuine investment of time—a well-stocked kitchen can take six to ten hours to pack properly, and that's before you've touched any other room in the house.
There are situations where professional packing just makes sense:
You have a lot of fragile or high-value items. A full set of china, crystal stemware, heirloom serving pieces—the risk of breakage on a DIY pack is real, and the cost of replacing irreplaceable items is almost always higher than the cost of having them packed by professionals who do this every day.
You're short on time. If you're working right up until the move, managing kids, or dealing with other life chaos alongside a relocation—which describes most people doing a Denver move—packing the kitchen yourself might simply not be realistic. Professional packers can do in three hours what takes most homeowners a full day.
You want peace of mind. A professionally packed kitchen means items are packed to a standard that experienced movers know works. When something arrives broken despite careful packing, it's frustrating. When it was professionally packed and covered, the outcome is different.
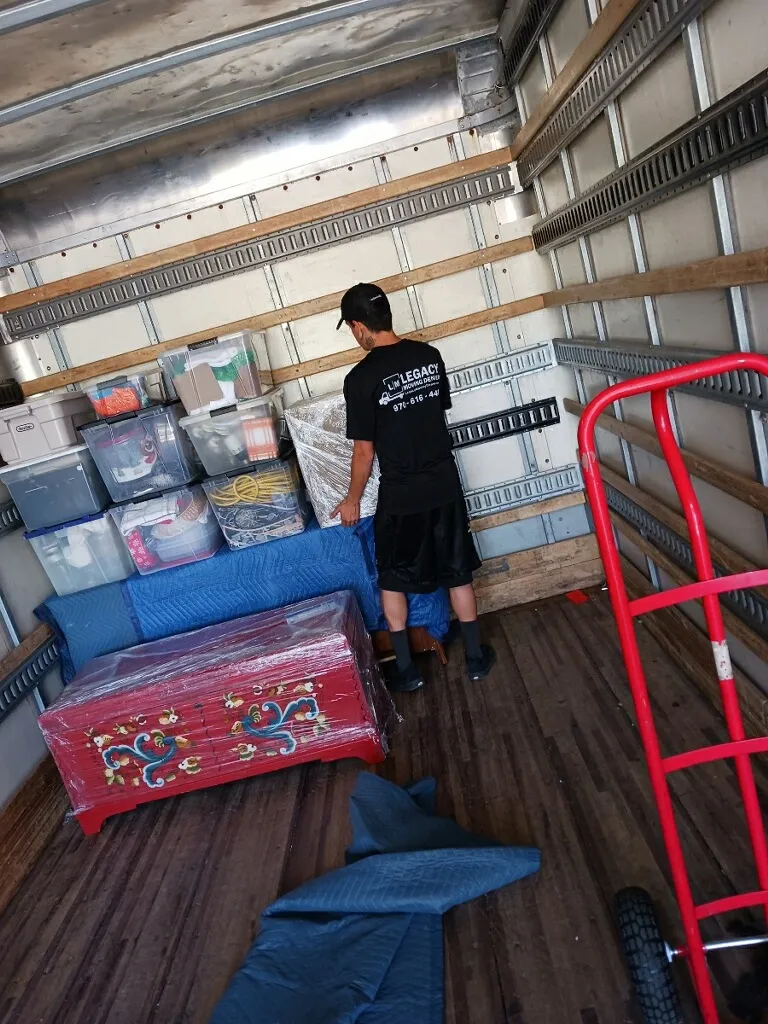
At Legacy Moving Denver, we offer professional packing services that can be customized—full packing where we handle everything, partial packing where we take specific rooms or item types, or just fragile-only packing where we handle the dishes and glassware while you pack the rest yourself. There's flexibility in how you structure it, and it's worth asking about when you call for your free quote. Packing services are priced separately from the move itself, and the cost varies based on what you need—check out our packing prices page for a general sense of what's involved.
We serve customers across the Denver metro area including Denver, Aurora, Lakewood, Centennial, Highlands Ranch, Arvada, and surrounding communities. If packing is part of what you're weighing, mention it when you reach out—we can walk you through what makes sense for your situation.
Putting It All Together: A Simple Kitchen Packing Order
If you want a simple sequence to follow, here's how most experienced packers approach a kitchen:
Weeks before the move: Pack formal dishes, special occasion items, holiday cookware, and any appliances you rarely use. Declutter the pantry—donate what you won't take, start using up perishables.
One week out: Pack glassware and stemware. Pack baking supplies. Clear out duplicates and rarely-used gadgets.
Two or three days out: Pack everyday dishes and remaining pantry items. Pack small appliances. Leave out only what you'll use in the next 48 hours.
Night before or morning of: Pack remaining everyday items—the plates you've been using, the coffeemaker after your morning coffee, the last few pots. Box up the dish soap and sponge. Do a final walk through the cabinets, pantry, and under the sink to catch anything you missed.
The kitchen is a project. Treat it like one—start early, work in stages, use the right supplies—and it goes from one of the most stressful parts of a move to a box you can genuinely check off your list.
If you want to see more general moving prep advice, our moving tips page covers a lot of the broader logistics. And if you're still figuring out what kind of help you need for your Denver move, the FAQ page is a good place to start.
Need Packing Help for Your Denver Move?
Whether you want us to pack the whole kitchen or just the fragile stuff, ask about packing options when you call for your free quote. We'll help you figure out what makes sense for your timeline and budget.